
Capturing a screenshot on Windows 12 is straightforward, Whether you’re dealing with the entire screen or a selective area, Windows 12 ensures you have the tools at your disposal.This guide delves into the methods available for both keyboard and mouse users, ensuring everyone can capture what they need efficiently.
Capturing the Entire Screen
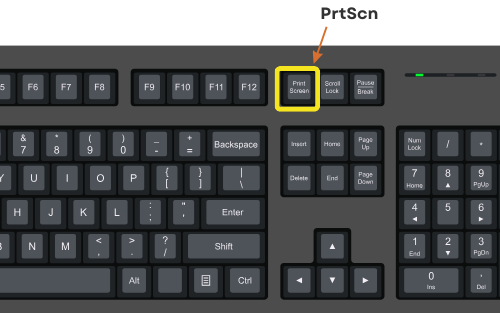
1. Print Screen (PrtScn) Key:
Pressing the Print Screen (PrtScn) key captures your entire screen and copies it to the clipboard. You can then paste this capture into an image editor like Paint or directly into documents and emails for quick sharing.
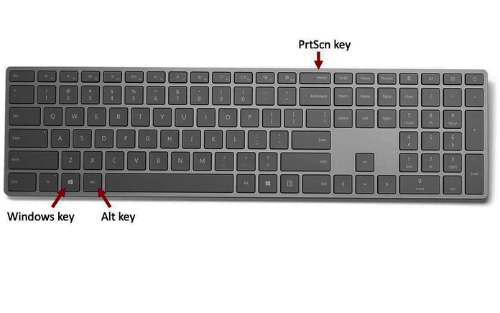
2. Win + Print Screen:
For an automatic save of your capture, use the Win + Print Screen shortcut. This dims your screen momentarily as the shot is taken and saved as a PNG file in the “Screenshots” folder within your Pictures library, ready for any use.
Capturing Specific Areas with the Snipping Tool
Using Keyboard and Mouse:
- Activate the Snipping Tool by pressing
Windows logo key + Shift + S. Your screen dims to let you select your screenshot area. - By default, you’re in Rectangular mode. The toolbar offers other shapes: Window, Full-screen, and Free-form modes.
- After selection, the screenshot goes directly to your clipboard. A notification pops up, offering further editing options upon selection.
Using Only a Mouse:
- Open the Snipping Tool via the Start menu. Type “snipping tool” and select it from the results.
- Click
Newto start your screenshot. Choose from the same modes as the keyboard method. - Like the keyboard method, your screenshot is saved to the clipboard, and a notification offers more editing options.
Tips for Effective Screenshotting
- Editing: Windows 12 provides editing tools like Paint or Photos. Use them to crop, annotate, or modify your screenshots before sharing.
- Shortcut Customization: Frequent screenshot takers might find it useful to customize keyboard shortcuts for quicker access.
- Third-Party Tools: For those seeking more advanced features, third-party apps can offer additional functionality like capturing scrolling screenshots.
Conclusion
Windows 12 makes taking screenshots an easy task, catering to a variety of needs and preferences. From quick captures of your entire screen to detailed snips using the Snipping Tool, the process is designed to be seamless. Remember these methods and tips to enhance your screenshotting experience, whether for work, tutorials, or personal records.
Leave a Reply